こんにちは、技術1課の加藤です。
みんな大好き Serverless Framework。 とてもよくできたサーバーレス環境のデプロイツールな訳ですが、SPAサイトを作りたい時、ホスティングをするのがなかなかやりづらくて困ったことがあります。
と思ったら、それを一発で解決してくれそうなプラグインを発見。
早速使ってみました。
※ 長くなりそうだったので準備編とデプロイ編で分けます。今回は Serverless Framework を使ったシンプルな API の作成と、API を叩くフロントエンドコードの作成のみ行います。
serverless-amplify-plugin
気になるプラグインはこちら。
@wizeline/serverless-amplify-plugin
A Serverless Framework plugin that enables you to easily host static websites with AWS Amplify Console including Continuous Deployment in as few as 3 lines of YAML.
とありますね 。ワクワクです。3行足すだけですってよ。
準備をする
では必要なリソースを準備していきます。
今回はシンプルな API を用意した上で、その API を叩く Vue.js の簡単なフロントエンドを作成します。
この環境を serverless のコマンド一発でデプロイしてやろうという寸法。やるぜ。
ツールインストール / ディレクトリ作成
今回、フロントエンド作成に Vue CLI、バックエンド構築に Serverless Framework を使いますので、これらをインストールします。
$ npm install -g @vue/cli serverless
$ vue --version
@vue/cli 4.x.x
$ serverless --version
Framework Core: 1.xx.0
...
また作業を行うためのディレクトリも作成しておきましょう。
$ mkdir serverless-amplify
$ cd serverless-amplify
$ pwd
/path/to/serverless-amplify
Simple API Endpoint の作成
今回は Serverless のページに掲載されていた Simple HTTP Endpoint というテンプレートを使います。
以下のコマンドでテンプレートからプロジェクトを生成します。
$ pwd
/path/to/serverless-amplify
$ serverless install -u https://github.com/serverless/examples/tree/master/aws-python-simple-http-endpoint -n serverless-amplify-backend
$ cd serverless-amplify-backend
出来上がったプロジェクト内でちょこっと修正が必要なので対応していきましょう。
まずPythonバージョンを3.7に変更、リージョンを東京リージョンにしておきます。(デフォルトのリージョンは us-east-1になります)
SPA からアクセスするので、 CORS の設定も ON にする必要があります。
service: serverless-amplify

frameworkVersion: ">=1.2.0 <2.0.0"

provider:
  name: aws
  runtime: python3.7  # 2.7 -> 3.7 に変更
  region: ap-northeast-1  # 一行追加

functions:
  currentTime:
    handler: handler.endpoint
    events:
      - http:
          path: ping
          method: get
          cors: true  # 一行追加
次に Lambda のコードを編集します。
こちらも CORS の対応のためです。
import json
import datetime


def endpoint(event, context):
    current_time = datetime.datetime.now().time()
    body = {
        "message": "Hello, the current time is " + str(current_time)
    }

    response = {
        "statusCode": 200,
        "body": json.dumps(body),
        # ここから追加
        "headers": {
          "Access-Control-Allow-Origin": "*"
        }
        # ここまで追加
    }

    return response
ではデプロイしてみましょう。
$ serverless deploy
...
Service Information
service: serverless-amplify-backend
stage: dev
region: ap-northeast-1
stack: serverless-amplify-backend-dev
resources: 11
api keys:
  None
endpoints:
  GET - https://xxxxxxxxxx.execute-api.ap-northeast-1.amazonaws.com/dev/ping
functions:
  currentTime: serverless-amplify-backend-dev-currentTime
layers:
  None
Serverless: Run the "serverless" command to setup monitoring, troubleshooting and testing.
endpoints に書かれている URL にアクセスしてみます。
以下のような JSON が取得できれば完成です。
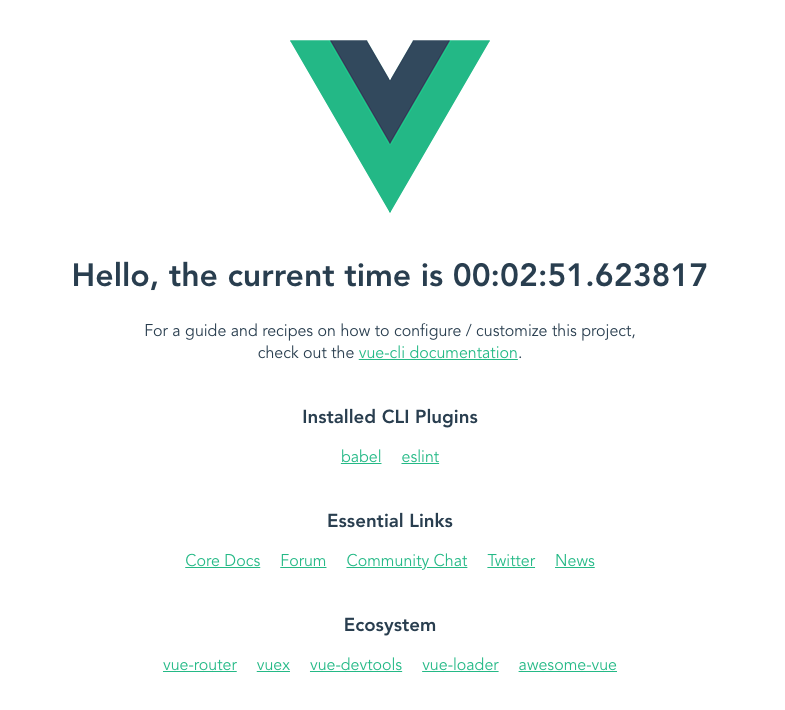
{"message": "Hello, the current time is 10:48:49.568250"}
Vue プロジェクトを作成
ではこの API を叩くフロントエンドのコードを作成します。
今回は Vue のプロジェクトを作ってやってみましょう。
バックエンドのディレクトリから抜けて serverless-amplify ディレクトリに戻り、以下を実行します。
$ pwd
/path/to/serverless-amplify
$ vue create serverless-amplify-frontend
? Please pick a preset: default (babel, eslint)  # default で Enter を押す
$ cd serverless-amplify-frontend
正しくサンプルプロジェクトが作成されたことを確認します。
$ npm run serve
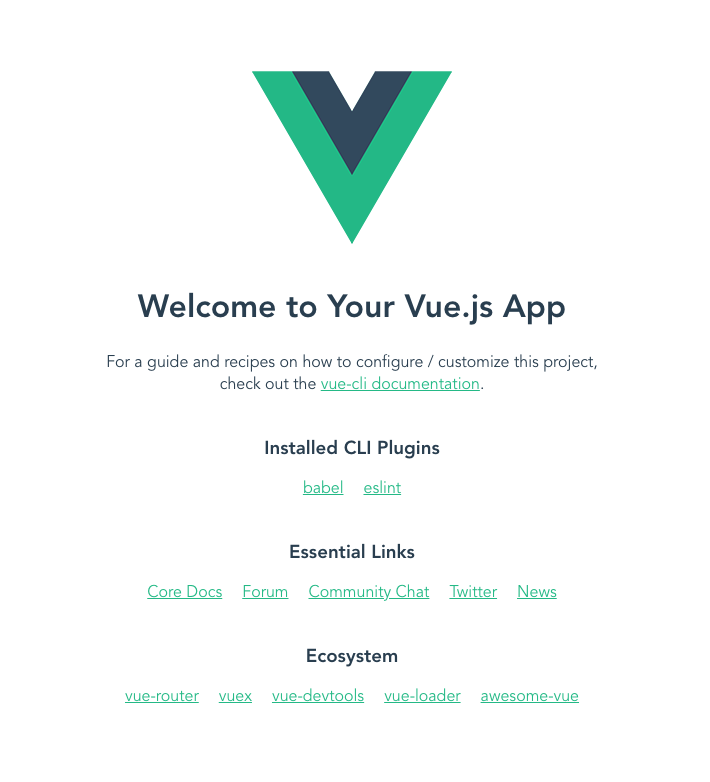
localhost:8080 を開いて以下が表示されれば OK です。
フロントエンドのコードを修正
フロントから先ほど作成した API を叩くようにします。
今回は src/App.js を以下のように修正していきましょう。
<template>
  <div id="app">
    <img alt="Vue logo" src="./assets/logo.png">
    <!-- 下の行を修正 -->
    <HelloWorld v-bind:msg="message"/>
  </div>
</template>

<script>
import HelloWorld from './components/HelloWorld.vue'

export default {
  name: 'App',
  components: {
    HelloWorld
  },
  // ここから追加
  data: function () {
    return {
      message: 'Loading...'
    }
  },
  mounted: function () {
    fetch('https://nfz4hxrfp1.execute-api.ap-northeast-1.amazonaws.com/dev/ping')
    .then(function (res) {
      return res.json()
    })
    .then(function (json) {
      this.message = json.message
    }.bind(this))
    .catch(function (err) {
      console.error(err)
    })
  }
  // ここまで追加
}
</script>

<style>
#app {
  font-family: Avenir, Helvetica, Arial, sans-serif;
  -webkit-font-smoothing: antialiased;
  -moz-osx-font-smoothing: grayscale;
  text-align: center;
  color: #2c3e50;
  margin-top: 60px;
}
</style>
これで API のレスポンス内容を表示するよう修正できました。
(詳しい修正内容の説明は今回端折ります。各自 Vue.js のドキュメントとか見つつ読み解いてあげてください。)
さて、今回はここまでとします。
次回、作成したコードを使って実際にデプロイを行ってみましょう。